
CalcBuilder Tutorial
Example: a loan calculator with an amortization schedule (Excel spreadsheet)
▶ A two-minute video walkthrough of the general Excel-workbook workflow. The written steps below now describe a refined version of this same calculator.
This is the Excel workbook version of the
loan calculator. Every number and every finance formula
— the monthly payment, the totals, the whole year-by-year amortization schedule — is
computed by an ordinary .xlsx that a non-technical person could open, follow and edit.
The only code anywhere in this calculator is a handful of PHP lines whose sole job is to turn a
table of numbers into a table of HTML, because that is the one thing Calc Builder's Exit Layout
cannot do by itself.
⇩ Download the sample workbook — loan_model.xlsx
1. Build the workbook
Create loan_model.xlsx with one sheet named Loan:
B1loan amount,B2annual rate %,B3term in years — these are the input cells.B5=B2/100/12(monthly rate),B6=B3*12(number of payments).B8monthly payment:=IF(B5=0, B1/B6, B1*B5*(1+B5)^B6/((1+B5)^B6-1))— format it#,##0.00.B9=B8*B6(total repaid),B10=B9-B1(total interest) — format both#,##0.00too.- A schedule block from row 14 (30 rows, one per possible year of term):
-CUMPRINC(...),-CUMIPMT(...)and the remaining balance, wrapped inIF(year>$B$3,"",…)so unused rows stay blank — also formatted#,##0.00.
That is the entire file: input cells, one small helper, three formatted
totals and a 30-row amortization block built from IF/MAX/
CUMPRINC/CUMIPMT. No string-building, no quotes-inside-quotes, no
& concatenation, no HTML anywhere — every formula is the kind of thing an
accountant, not a programmer, would write. Calc Builder evaluates it all with PhpSpreadsheet, so
the standard Excel functions work on the server exactly as in Excel.
2. Create the calculator and the form fields
Components → Calc Builder → Add → name it
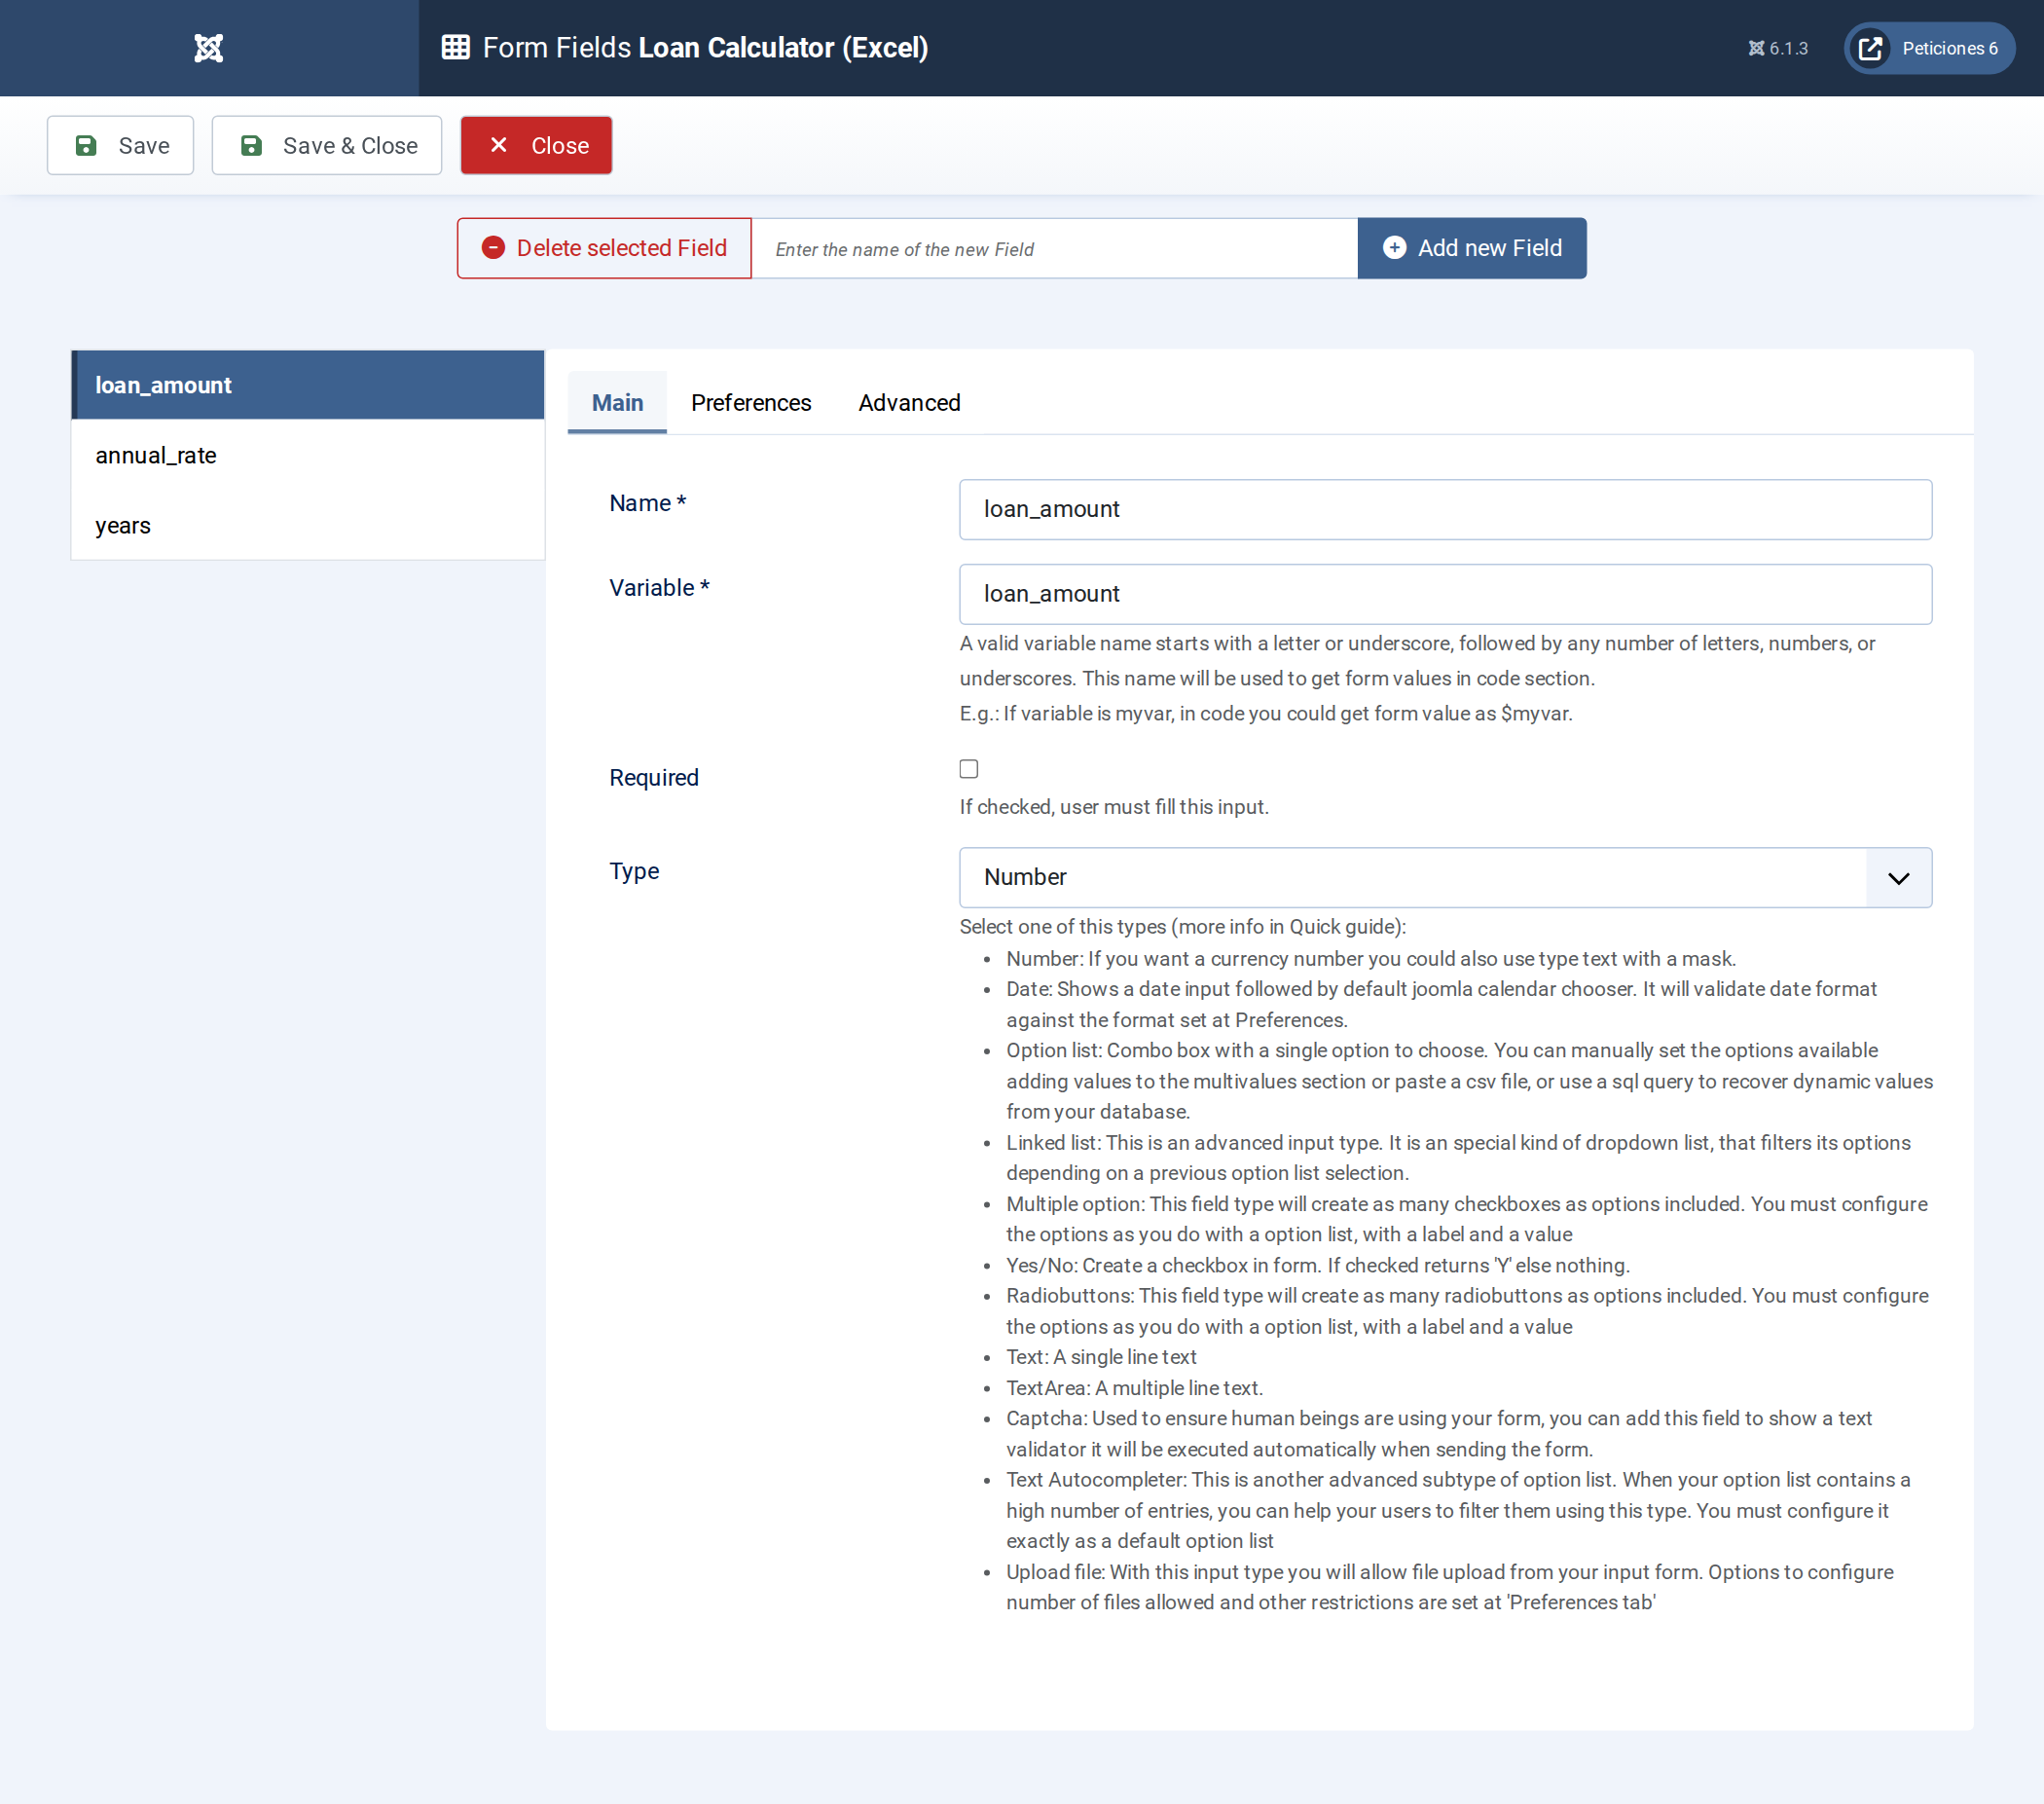
Loan Calculator (Excel). On Form Fields add the same three
Number fields as the PHP version: loan_amount (default 20000),
annual_rate (2 decimals, default 6.5), years (default 5).
3. Upload the workbook — Spreadsheet screen
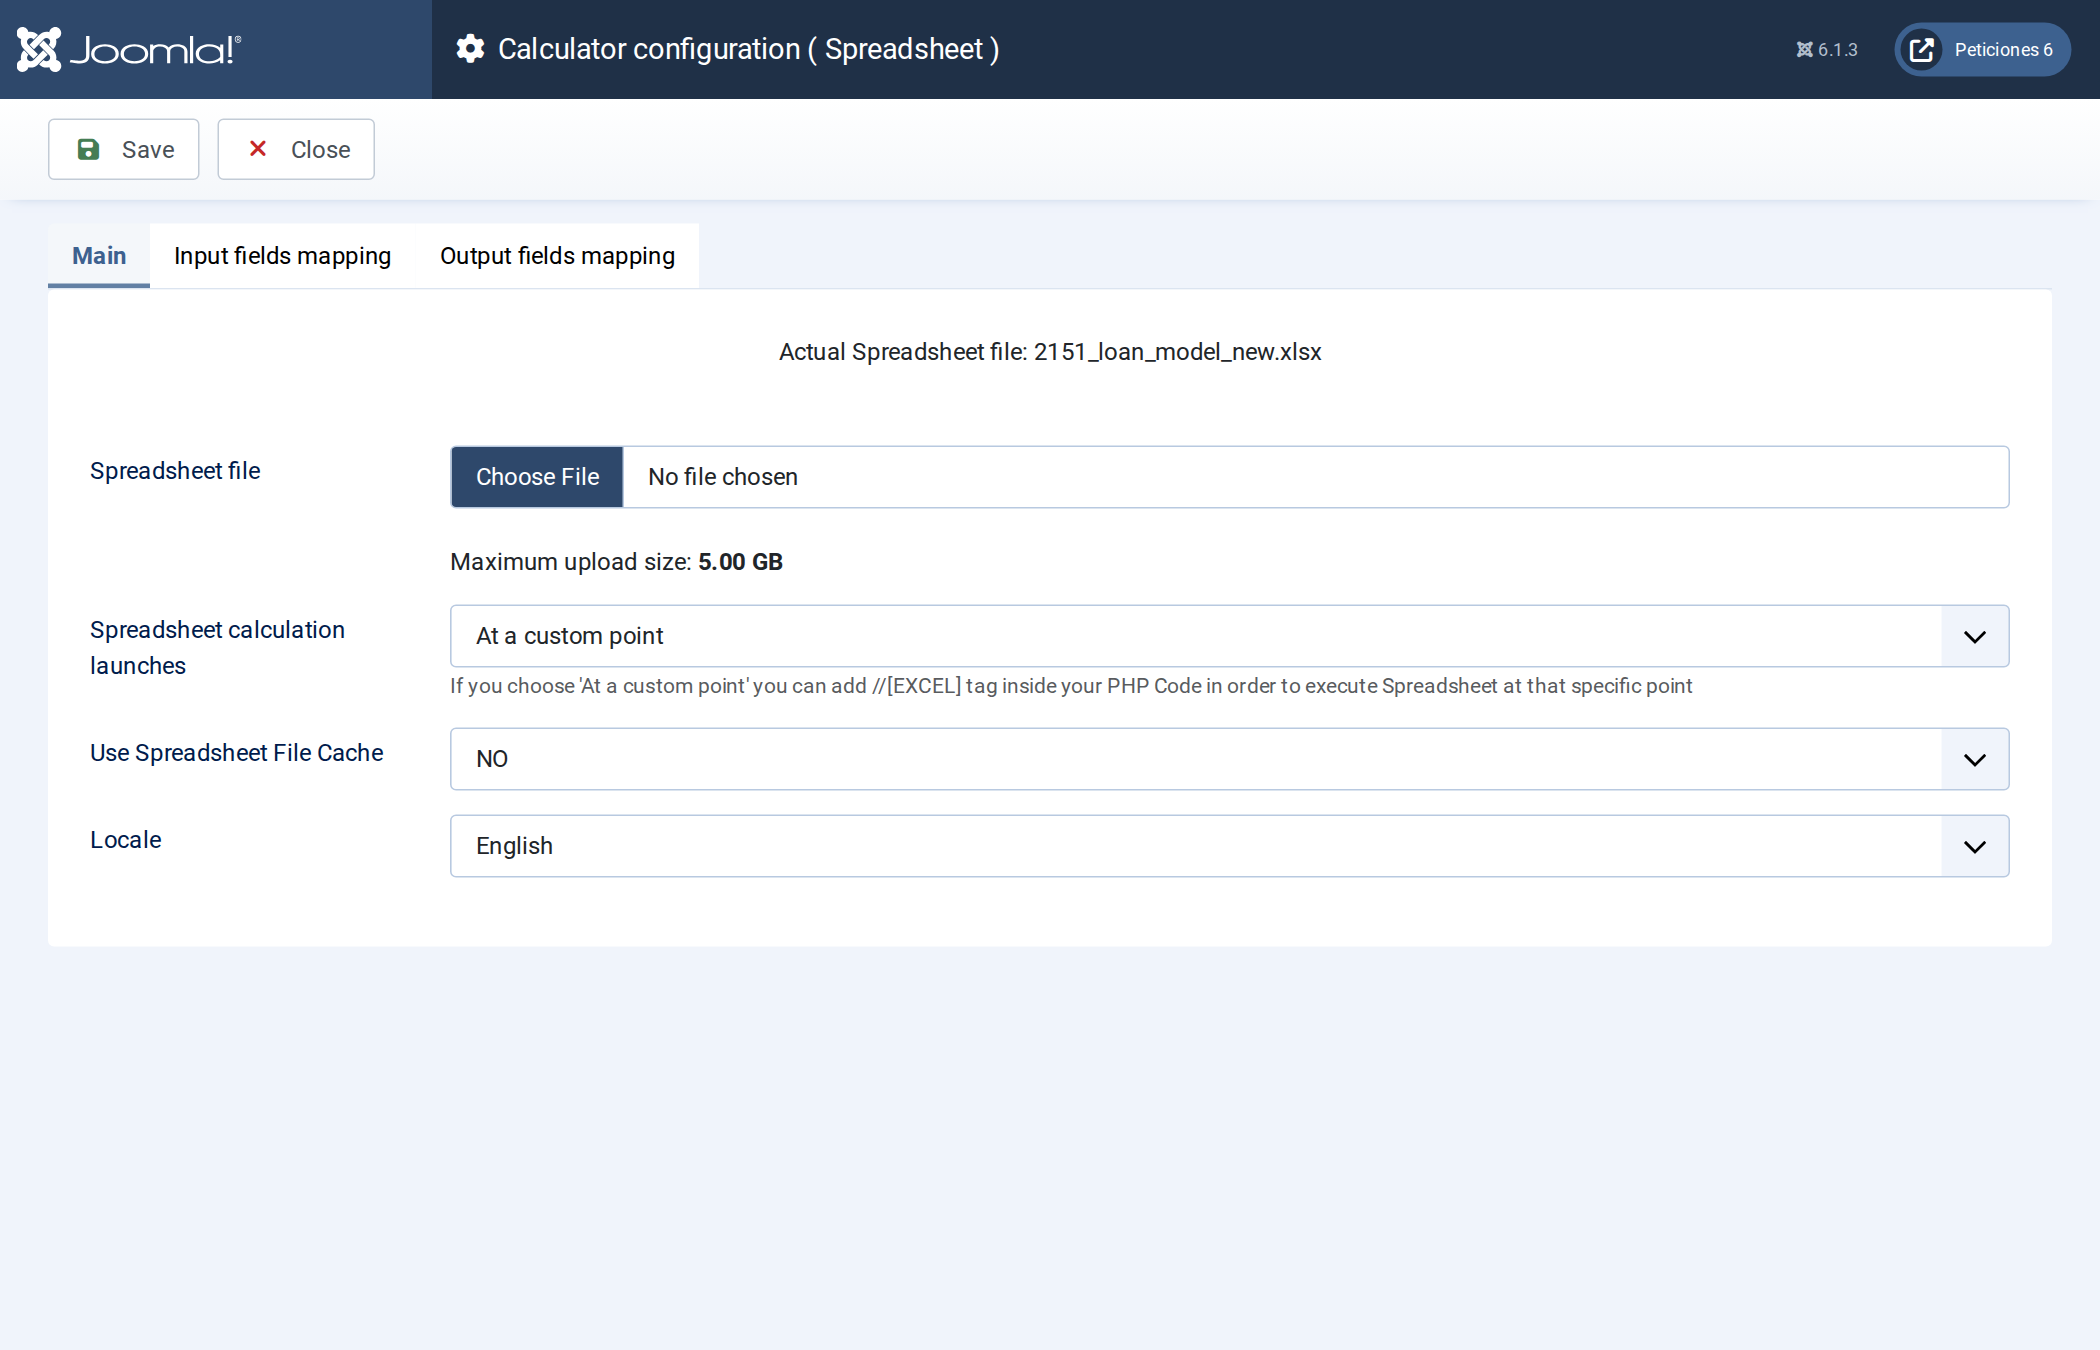
- Open the Spreadsheet screen from the toolbar.
- Choose File and pick
loan_model.xlsx. - Spreadsheet calculation launches: choose At a custom point, so we can
place a
//[EXCEL]marker in the (very short) PHP code and read the schedule cells straight after the workbook recalculates. - Leave Use Spreadsheet File Cache off while testing; set Locale to English.
4. Map the form fields to input cells
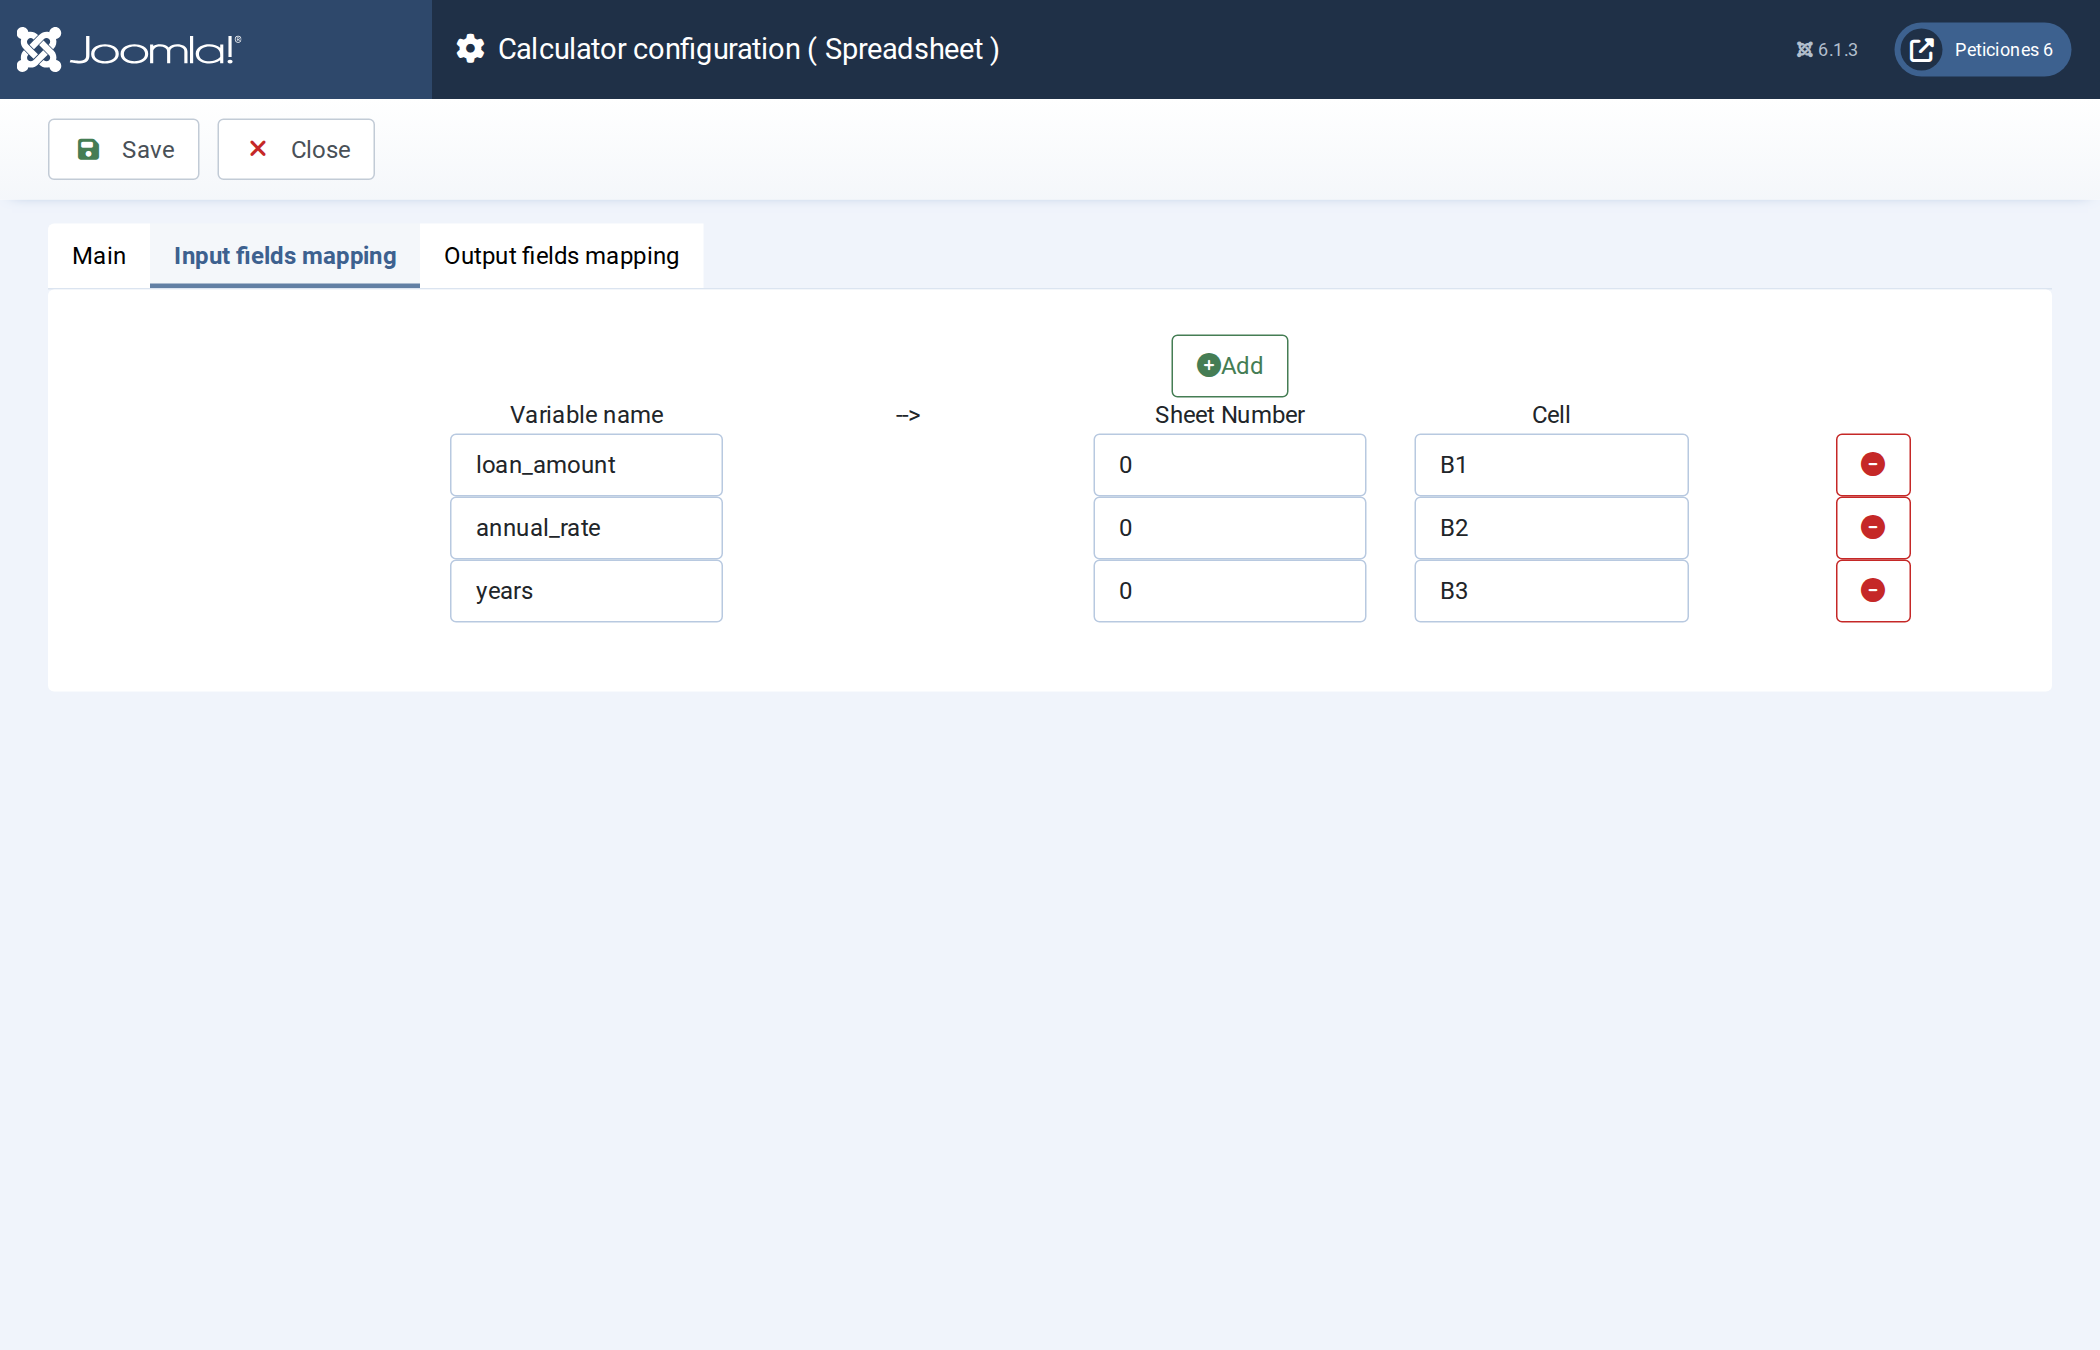
On Input fields mapping, click Add once per field and fill Variable name → Sheet Number → Cell:
loan_amount→ sheet0→B1annual_rate→ sheet0→B2years→ sheet0→B3
“Sheet Number” is the zero-based index of the tab —
0 is the first sheet.
5. Map result cells to variables
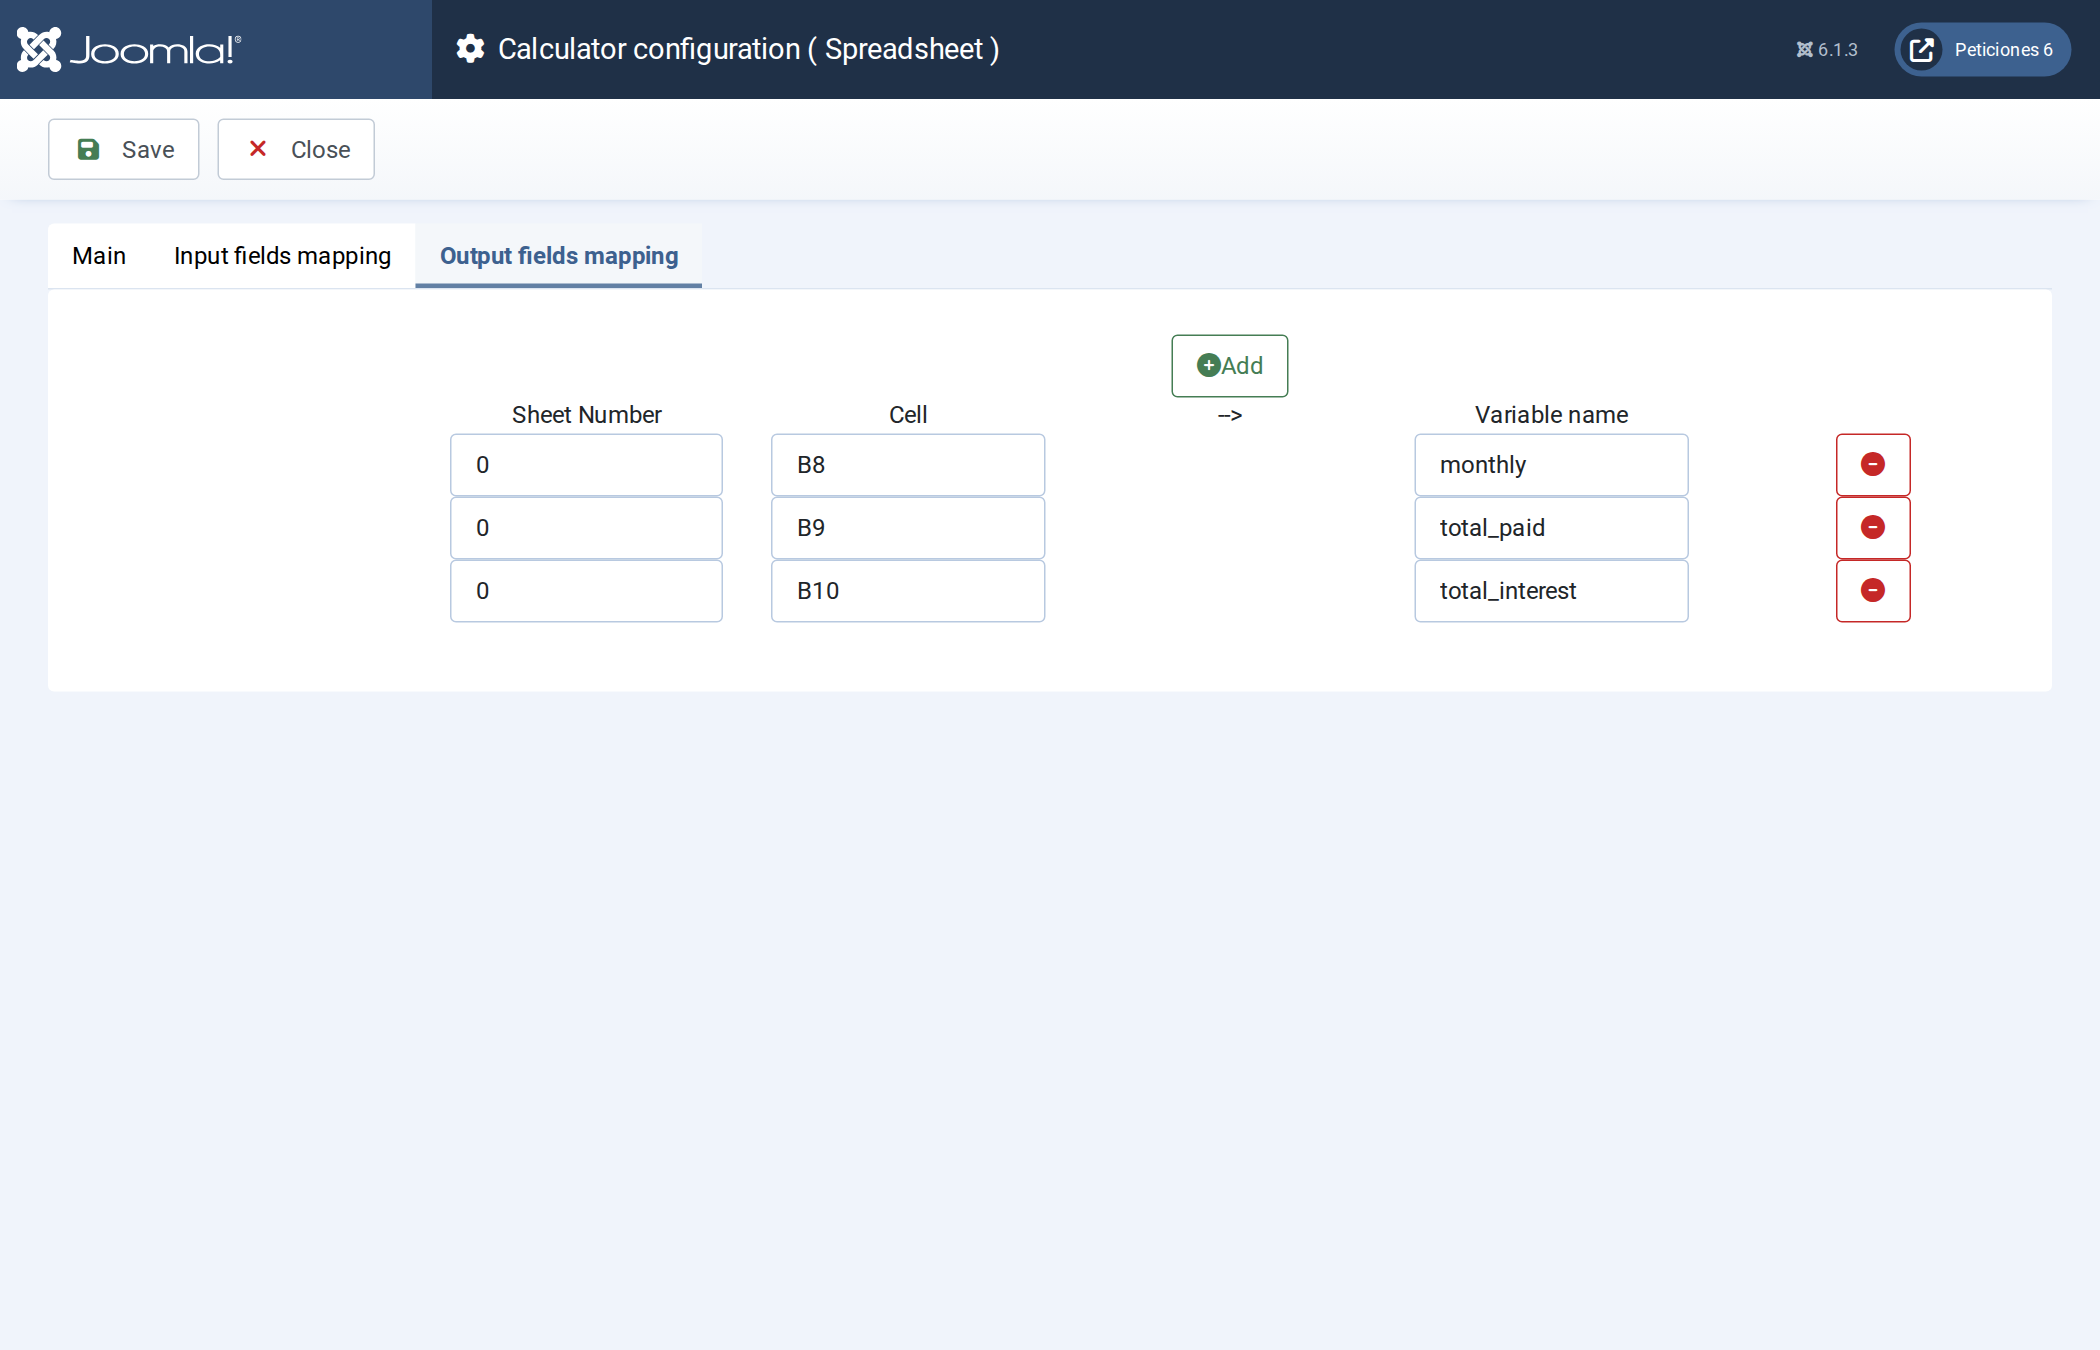
On Output fields mapping, map Sheet Number → Cell → Variable name for the three headline totals:
0/B8→monthly0/B9→total_paid0/B10→total_interest
Save. The 30-row schedule block is not mapped here — there is no field to map “a variable number of rows” to a single variable, so the next step reads that block directly instead.
6. PHP code — only enough to draw the table
![The PHP code with the //[EXCEL] marker](/assets/images/extensiones/calcbuilder/t6_cb_excel_php.webp "The PHP code with the //[EXCEL] marker")
After //[EXCEL], $objPHPExcel is the loaded workbook. This loop is the
only code in the whole calculator — it does not compute anything, it only walks the numbers
the spreadsheet already produced and wraps each row in <tr>:
//[EXCEL]

$sheet = $objPHPExcel->getSheet(0);
$schedule_rows = '';
for ($r = 14; $r <= 13 + (int) $years; $r++) {
    $yr = $sheet->getCell("A$r")->getFormattedValue();
    if ($yr === '') break; // blank row = past the loan's term
    // getFormattedValue() already applied the cell's own #,##0.00 Excel format --
    // no (float) cast, no number_format() needed.
    $pr  = $sheet->getCell("B$r")->getFormattedValue();
    $int = $sheet->getCell("C$r")->getFormattedValue();
    $bal = $sheet->getCell("D$r")->getFormattedValue();
    $schedule_rows .= "<tr><td>$yr</td><td class='text-end'>$pr</td>"
                    . "<td class='text-end'>$int</td><td class='text-end'>$bal</td></tr>";
}
Thirteen lines, none of them finance maths, and every value in them was already formatted by Excel. Compare that with the PHP-code version, where the interest-rate arithmetic itself lives in PHP.
7. Exit Layout, Preferences & publish
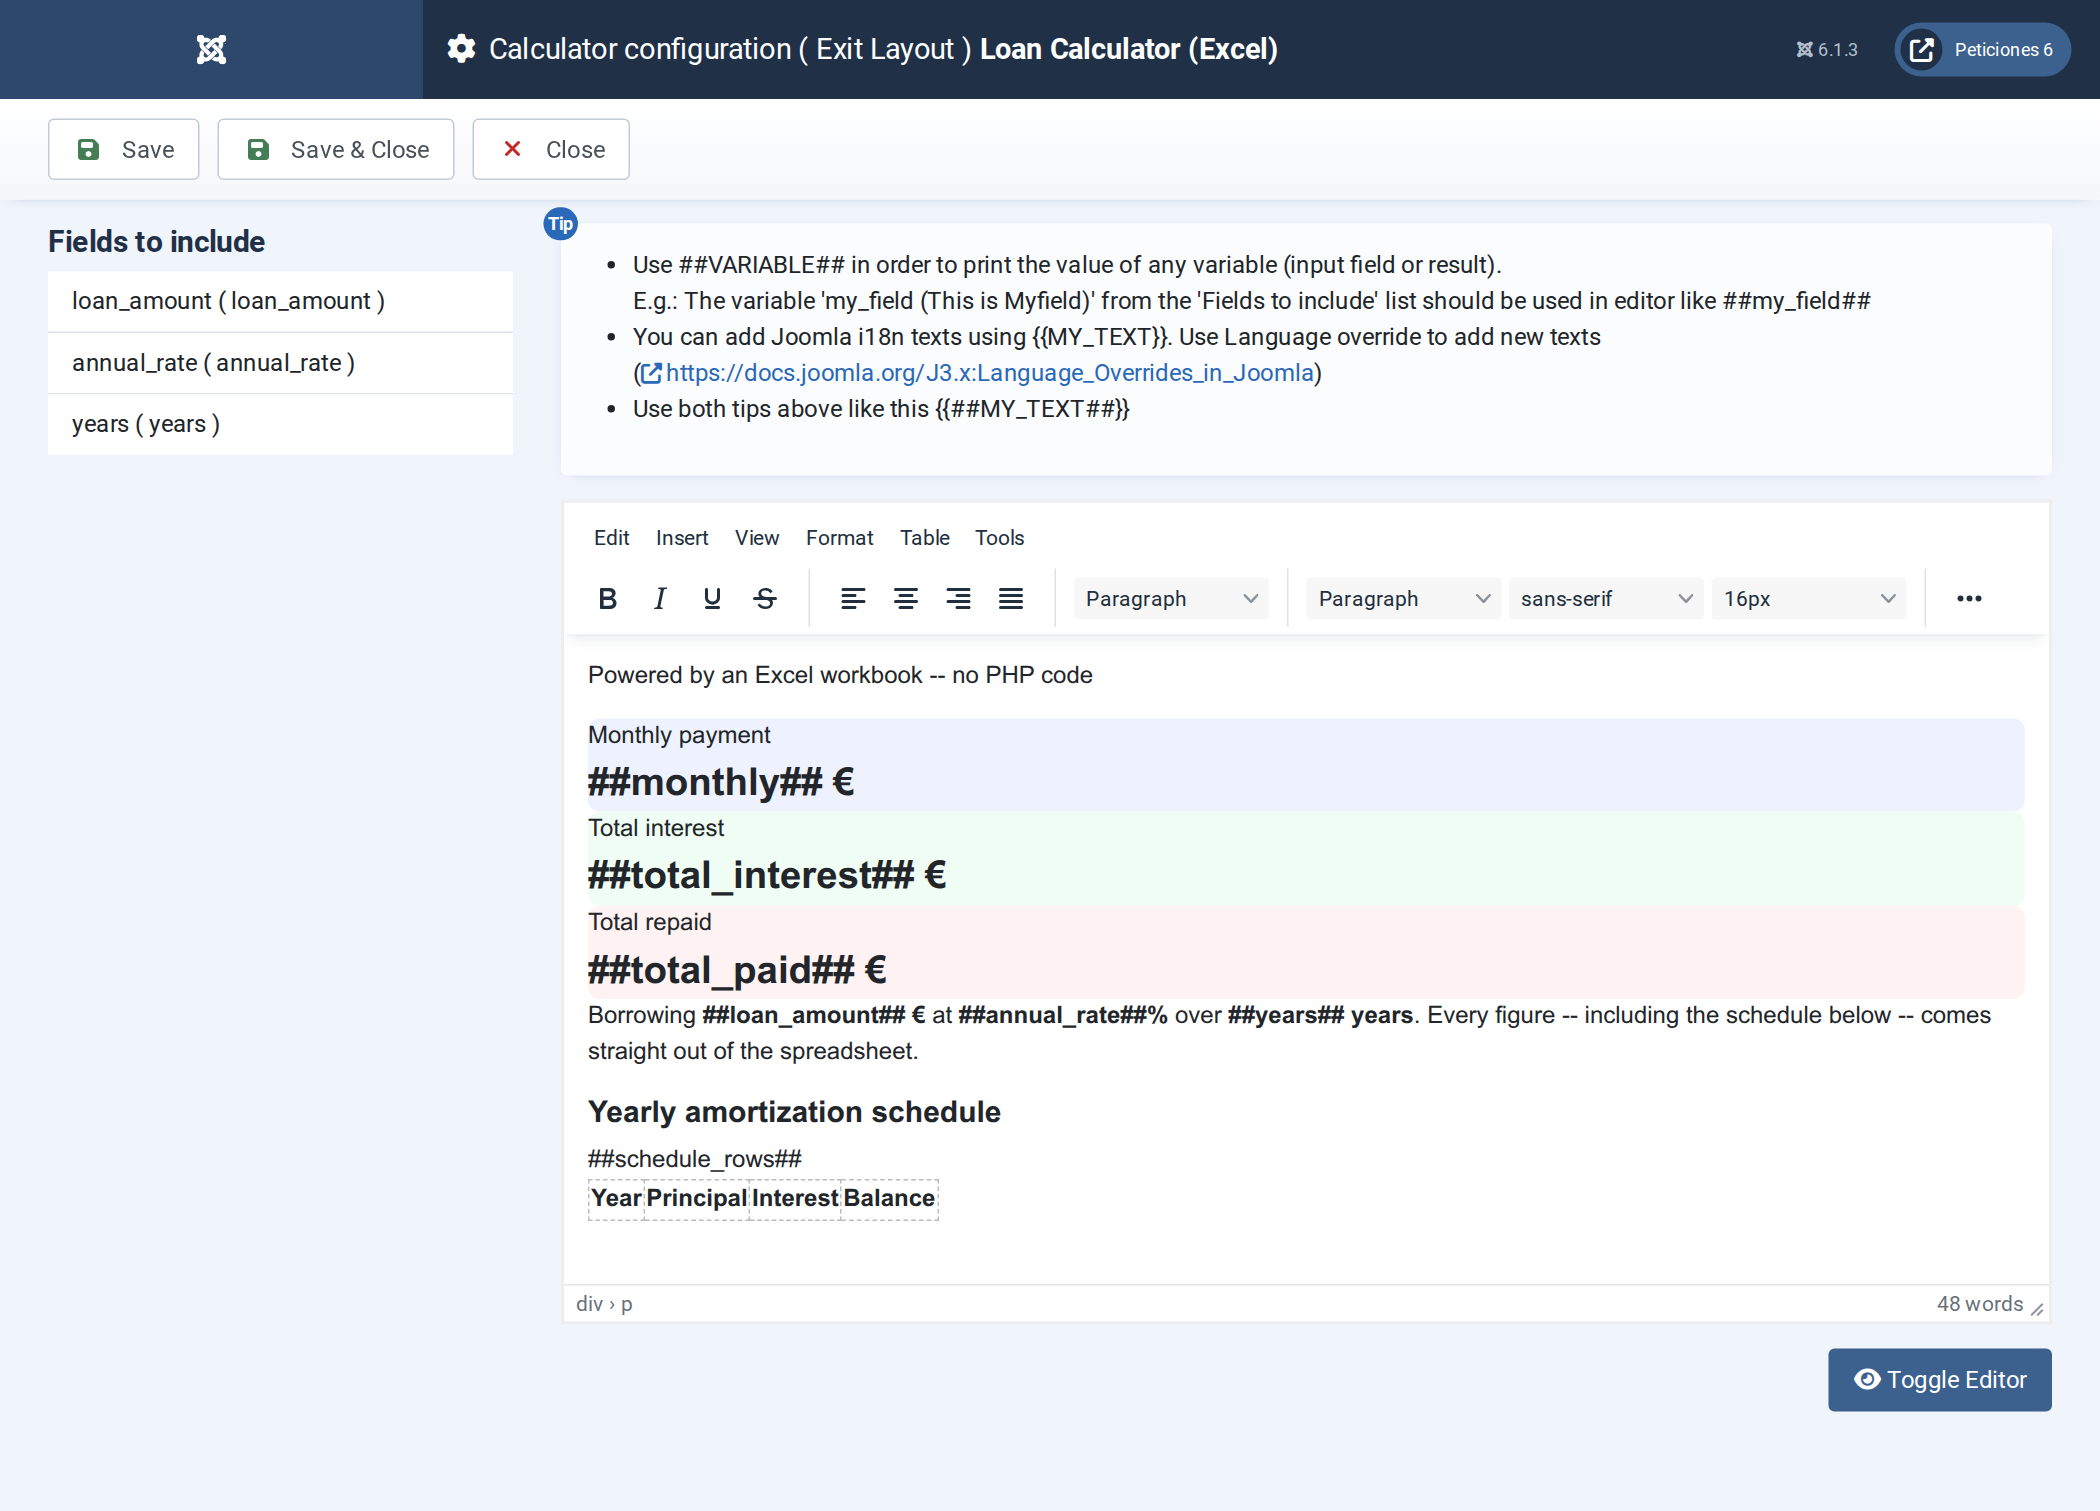
Three summary cards, a sentence restating the inputs, then the schedule — the
<table> itself is plain HTML written here, with ##schedule_rows##
standing in only for the <tr> cells the PHP loop built:
<div class="row g-3 mb-4">
  <div class="col-md-4">…##monthly## €…</div>
  <div class="col-md-4">…##total_interest## €…</div>
  <div class="col-md-4">…##total_paid## €…</div>
</div>
<p>Borrowing ##loan_amount## € at ##annual_rate##% over ##years## years.</p>
<h5>Yearly amortization schedule</h5>
<table class="table table-sm table-striped">
  <thead><tr><th>Year</th><th>Principal</th><th>Interest</th><th>Balance</th></tr></thead>
  <tbody>##schedule_rows##</tbody>
</table>
On Preferences set the button text and calculate on load. Publish with a menu item of type Calc Builder and select Loan Calculator (Excel) on the Options tab.
Result
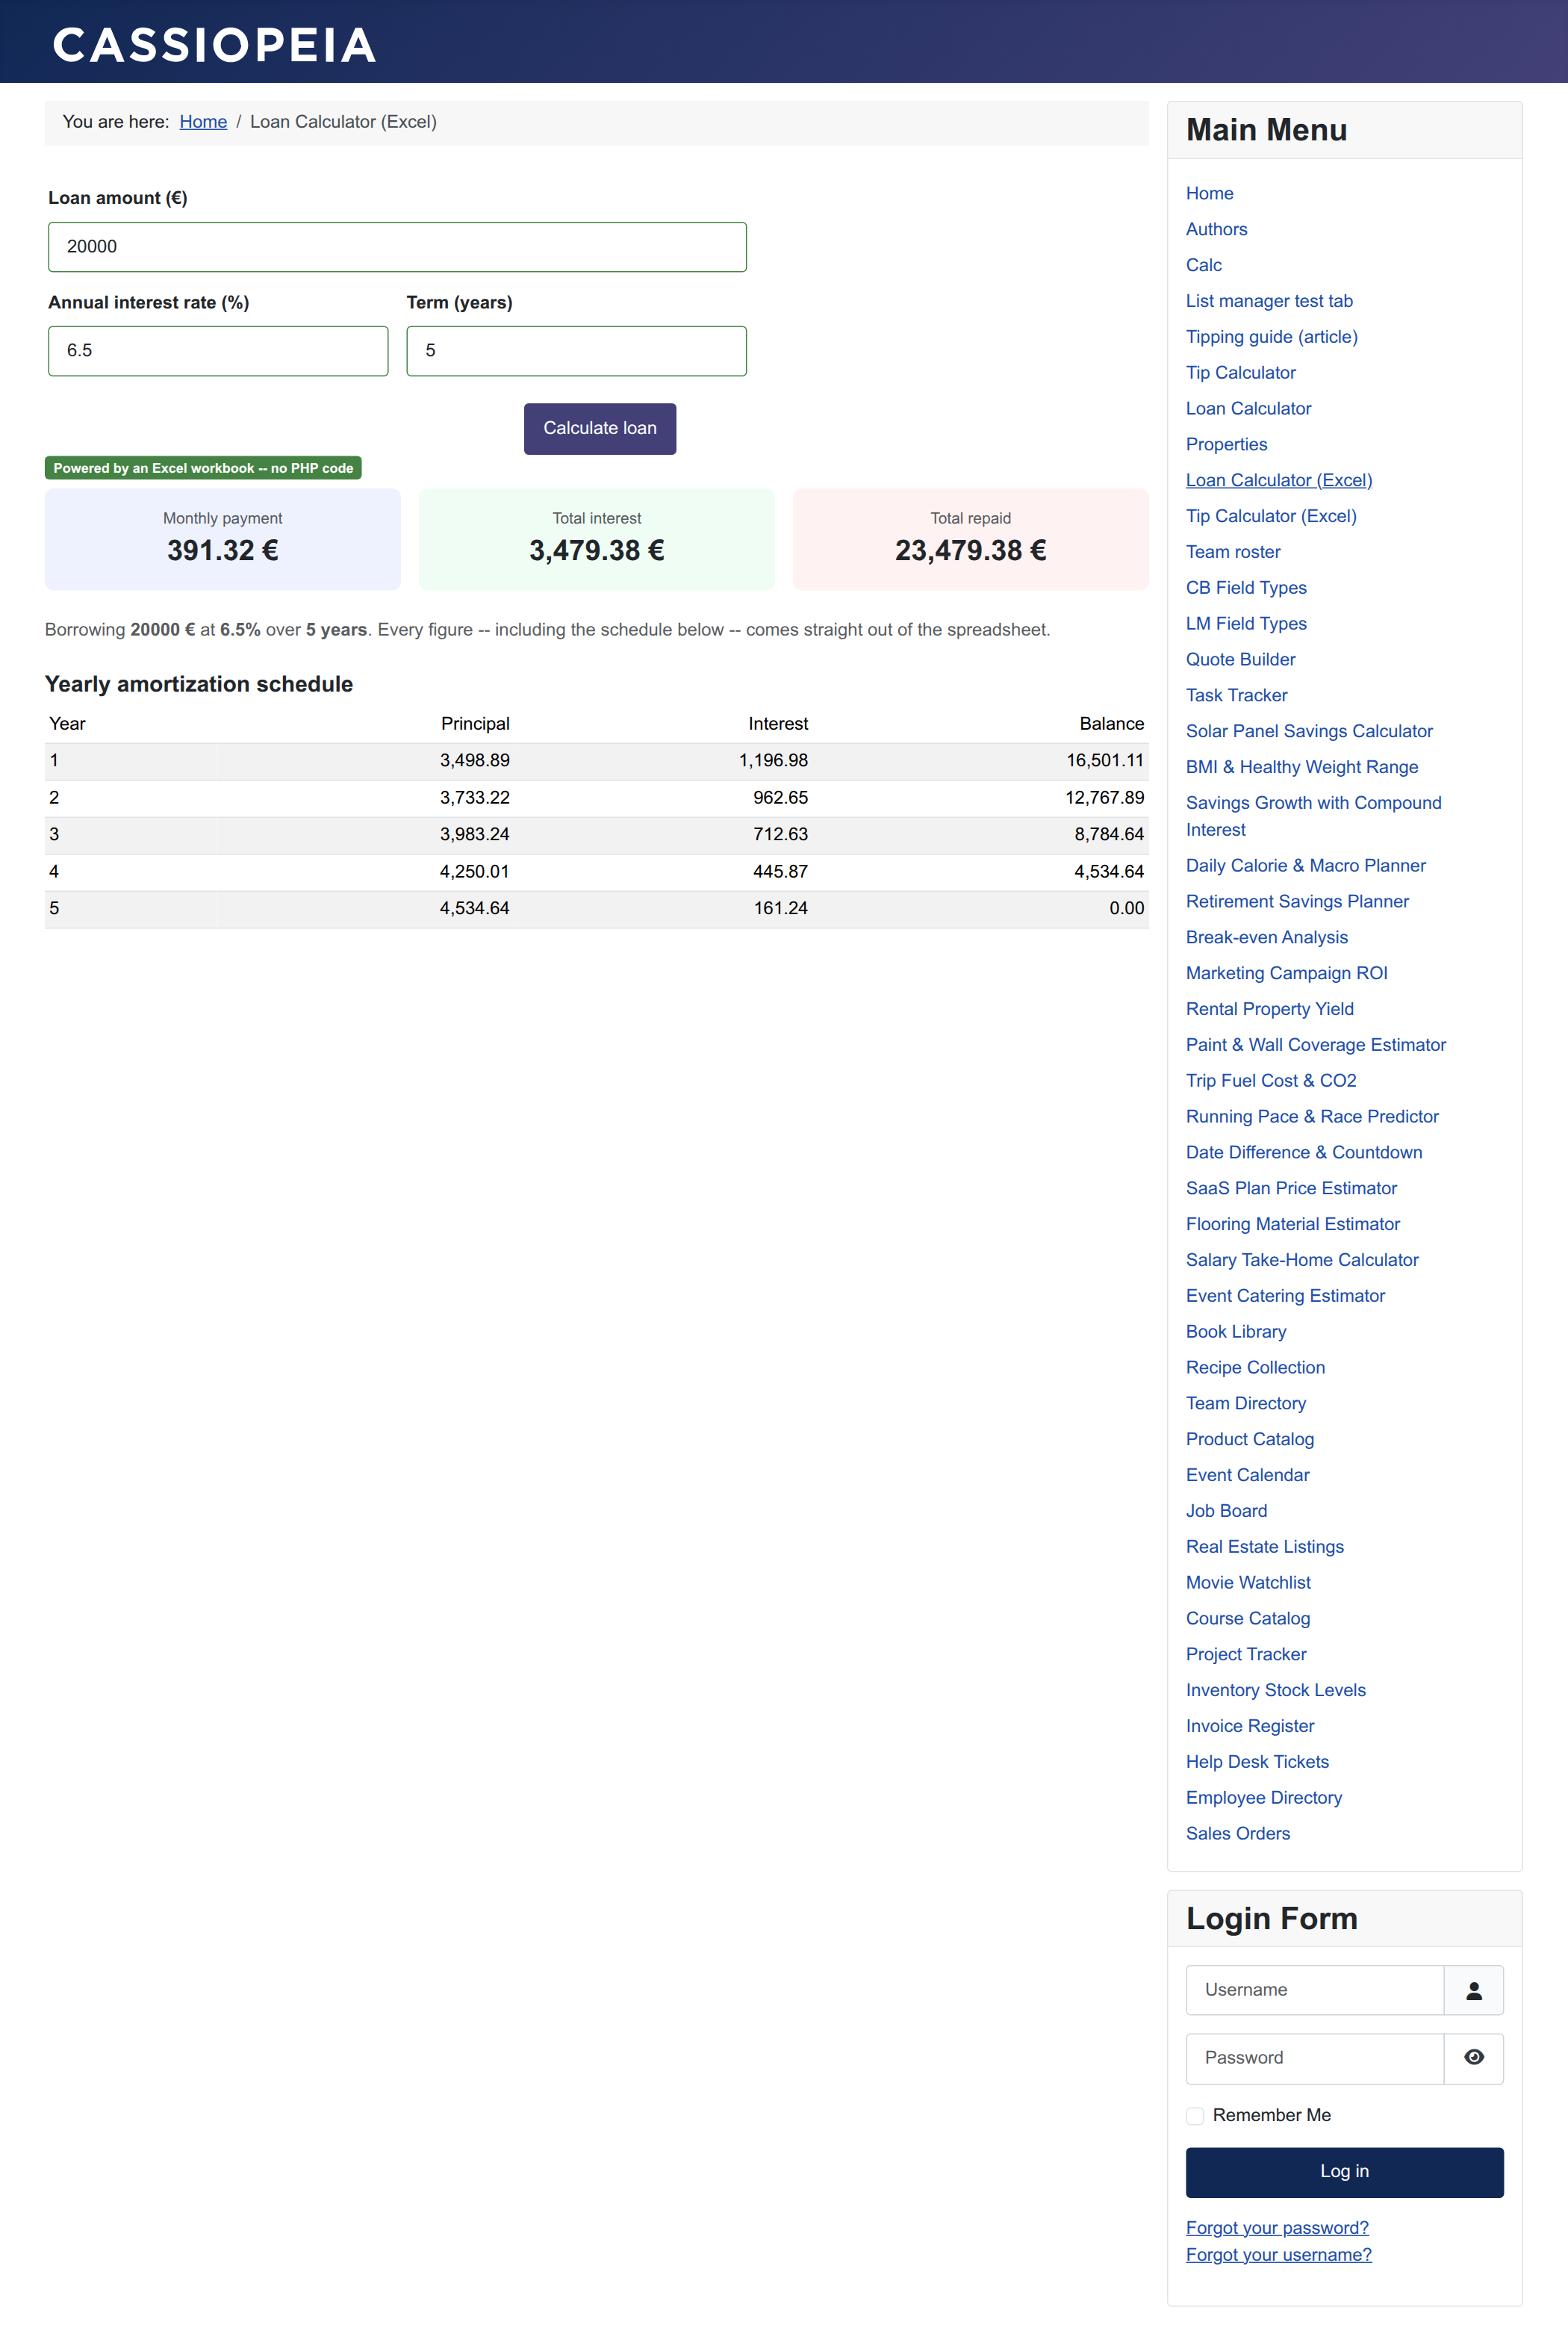
Identical output to the PHP version — monthly payment 391.32 €, total interest 3,479.38 €, and the full schedule — but the financial model lives entirely in a file a non-developer can open, edit and re-upload, and the site owner never has to touch a line of interest-rate maths.
PHP code vs. Excel workbook — which to use?
- PHP code: nothing to upload, easy version control, full programming power, best when the logic is simple or very custom.
- Excel workbook: reuse a model that already exists, hand maintenance to whoever owns the spreadsheet, keep complex financial/engineering formulas readable. Even a result that includes a variable-length table — like this one — only costs a dozen boring lines of PHP to display; the finance logic itself never has to leave Excel. Slightly slower per calculation on heavy workbooks (enable cache once you're no longer editing the file).